Getting Started
Note
Data samples from this tutorial can be used under open licence.
Quick Start
Install Docker
Download CARS Quick Start
$ wget https://raw.githubusercontent.com/CNES/cars/master/tutorials/quick_start.sh
Run this quick_start.sh script
$ ./quick_start.sh
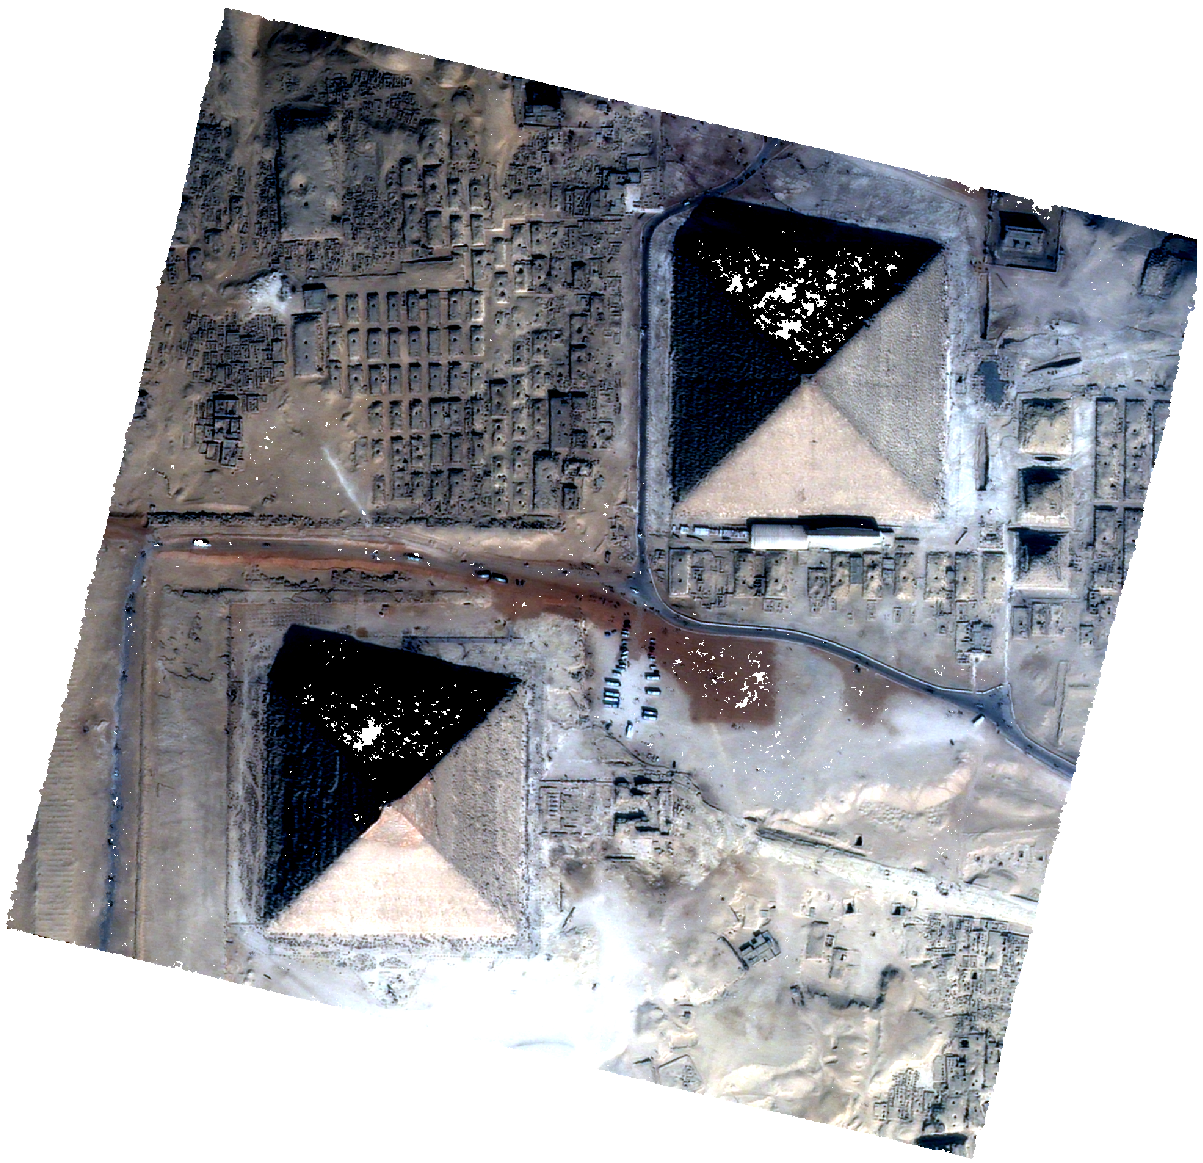
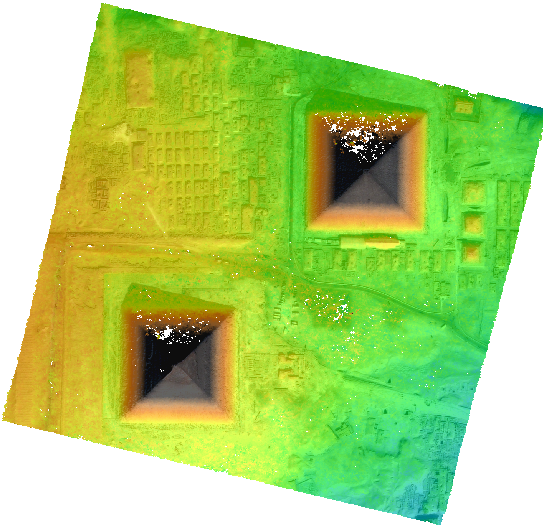
Go to the data_gizeh/outresults/ output directory to get a DSM and color image associated.
Open the dsm.tif DSM and clr.tif color image in QGIS software.
dsm.tif |
clr.tif |
QGIS Mix |
|
|
|

Steps by steps
Check Docker install
$ docker -v
Get CARS dockerfile image
$ docker pull cnes/cars
Get and extract data samples from CARS repository:
$ wget https://raw.githubusercontent.com/CNES/cars/master/tutorials/data_gizeh.tar.bz2
$ wget https://raw.githubusercontent.com/CNES/cars/master/tutorials/data_gizeh.tar.bz2.md5sum
$ md5sum --status -c data_gizeh.tar.bz2.md5sum
$ tar xvfj data_gizeh.tar.bz2
Launch CARS with sensor_to_full_resolution_dsm pipeline for img1+img2 and img1+img3 pairs:
$ docker run -w /data -v "$(pwd)"/data_gizeh:/data cnes/cars /data/configfile.json
Configuration example for quick_start data_gizeh:
{
        "inputs": {
            "sensors" : {
                "one": {
                    "image": "img1.tif",
                    "geomodel": "img1.geom",
                "color": "color1.tif",
                    "no_data": 0
                },
                "two": {
                    "image": "img2.tif",
                    "geomodel": "img2.geom",
                    "no_data": 0

                },
                "three": {
                    "image": "img3.tif",
                    "geomodel": "img3.geom",
                    "no_data": 0
                }
            },
            "pairing": [["one", "two"],["one", "three"]],
             "initial_elevation": "srtm_dir"
        },

        "output": {
              "out_dir": "outresults"
        }
}
Clean Unix rights on Docker generated data.
$ docker run -it -v "$(pwd)"/data_gizeh:/data --entrypoint /bin/bash cnes/cars -c "chown -R '$(id -u):$(id -g)' /data/"
Show resulting output directory
$ ls -l data_gizeh/outresults/
Warning
This first tutorial uses Docker to avoid CARS installation. To go further, follow Install and User guide.
Advanced Quick Start
Install CARS on your system directly.
Follow now CARS Advanced Quick Start script with the same steps than previous quick start.
Docker Jupyter
For more docker usage with jupyter, go to Docker guide.