Edge detection with CARS
The main idea of “Edge Detection” is to improve 3D reconstruction on buildings for CARS. To achieve this, we will use an edge map to enhance the SGM optimization in CARS.
To produce this edge map, we will use CARS’s Edge detection plugin.
This plugin relies on the MoGe2 model.
MoGe2 is a deep-learning model dedicated to 3D reconstruction from a single (monocular) image.
The plugin generates a file called edges.tif, which is the edge map that will subsequently be used by CARS.
Below are some instructions on how to use this plugin with CARS:
Step 1: Install the plugin
The plugin can be installed in an existing Python environment using the following command:
pip install cars-edge-detection-plugin
Or, you can install it with CARS in a single command using the following command:
pip install cars[edge_detection]
Finally, you can also install it from the source code by cloning the repository and running the following command:
git clone https://github.com/CNES/cars-edge-detection-plugin.git
cd cars-edge-detection-plugin

# optionally, create a virtual environment
python -m venv venv
source venv/bin/activate

# install the plugin
pip install .
Step 2: Download the MoGe2 model
There are multiple ways to download the required MoGe2 model, depending on your environment and preferences.
You can choose one of the following methods:
Method 1: Using the provided executable script
cars-download-moge2 --model vitl-normal
Method 2: Using wget (suitable for environments with controlled internet access)
# Fetch the model
wget https://huggingface.co/Ruicheng/moge-2-vitl-normal/resolve/main/model.pt

# Move the model to the correct location.
# It must be placed under cars_edge_detection_plugin/applications/depth_map_generation/models
# with the proper name for each model:
# - moge-2-vitl-normal.pt
# - moge-2-vitb-normal.pt
# - moge-2-vits-normal.pt

mkdir -p [your/plugin/installation/path]/cars_edge_detection_plugin/applications/depth_map_generation/models

mv ./model.pt [your/plugin/installation/path]/cars_edge_detection_plugin/applications/depth_map_generation/models/moge-2-vitl-normal.pt
Step 3: Run the plugin
The plugin can be run either as a standalone pipeline, or integrated into the CARS pipeline.
As a standalone pipeline
The standalone pipeline is useful for testing the plugin and generating the edge map independently of CARS, making it possible to review data before doing a full CARS run with it.
For the standalone pipeline, you can use the following command:
cars ./config_plugin_edge.yaml
where a basic config_plugin_edge.yaml is a configuration file that follows this format :
pipeline: edge_detection

input:
  sensors:
    img1: /path_to_img1
    img2: /path_to_img2

# options for edge detection, can be entirely omitted if you want to use the default settings
edge_detection:
  advanced:
    right_image_edge_detection: true # if true, will run edge detection on the right images as well
  applications:
    depth_map_generation:
      method: moge2 # the only supported method for now
      model: Ruicheng/moge-2-vitl-normal # the model weights to use for depth map generation
      save_intermediate_data: true # whether to save intermediate data (e.g. depth maps, normal maps) to the output directory
      edge_threshold: 0.7 # the threshold for edge detection, lower values will result in more edges being detected

output:
  directory: out_edge_detection/
{
    "pipeline": "edge_detection",
    "input": {
        "sensors": {
            "img1": "/path_to_img1",
            "img2": "/path_to_img2"
        }
    },
    "edge_detection": {
        "advanced": {
            "right_image_edge_detection": true
        },
        "applications": {
            "depth_map_generation": {
                "method": "moge2",
                "model": "Ruicheng/moge-2-vitl-normal",
                "save_intermediate_data": true,
                "edge_threshold": 0.7
            }
        }
    },
    "output": {
        "directory": "out_edge_detection/"
    }
}
The output of this command will be located in the output directory specified in the configuration file,
and will contain a folder for each left image, itself containing the generated edge map edges.tif.
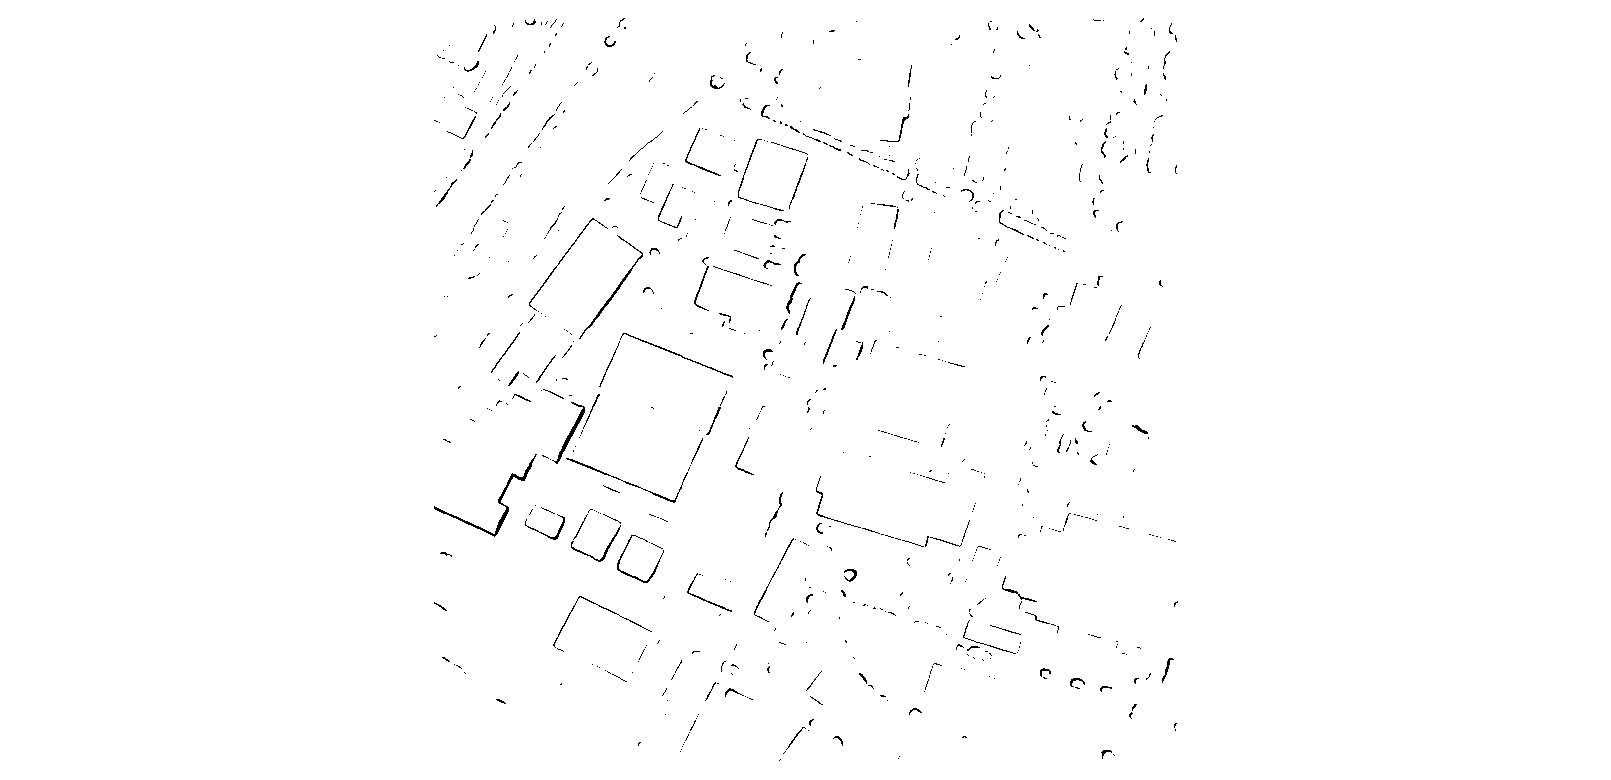
Below is an example of an edge map generated by the plugin:
To inject the edge map back into CARS, you can then use the following configuration:
input:
  sensors:

    # first option : simply provide the path to the edges mask
    img1:
      image: /path_to_img1
      edges: /out_edge_detection/img1/edges.tif

    # second option : provide a dictionary with the path to the edges mask, and optionally additional data
    img2:
      image: /path_to_img2
      edges:
        edges_mask: /out_edge_detection/edge_detection/img2/edges.tif
        depth_map: path/to/depth_map.tif
        normals: null # any key without data can be set to null, or omitted entirely
        tile_id: path/to/tile_id.tif

    # not all images need to have edges masks
    img3: /path_to_img3

  pairing:
    - - img1
      - img2
    - - img1
      - img3

output:
  directory: out_cars/
{
    "input": {
        "sensors": {
            "img1": {
                "image": "/path_to_img1",
                "edges": "/out_edge_detection/img1/edges.tif"
            },
            "img2": {
                "image": "/path_to_img2",
                "edges": {
                    "edges_mask": "/out_edge_detection/edge_detection/img2/edges.tif",
                    "depth_map": "path/to/depth_map.tif",
                    "normals": null,
                    "tile_id": "path/to/tile_id.tif"
                }
            },
            "img3": "/path_to_img3"
        },
        "pairing": [
            [
                "img1",
                "img2"
            ],
            [
                "img1",
                "img3"
            ]
        ]
    },
    "output": {
        "directory": "out_cars/"
    }
}
As part of CARS’s default pipeline
The plugin is also seamlessly integrated into the CARS pipeline, allowing you to run the edge detection and 3D reconstruction in a single command.
CARS will automatically detect the presence of the plugin and run it if it is installed. This means that you can simply run the CARS pipeline as usual, and the plugin will be executed as part of the process.
To check if the plugin is installed, you can use the following command:
pip show cars-edge-detection-plugin
A normal CARS run can then be executed.
Disabling Edge detection
While the plugin is automatically detected and run if installed, there may be cases where you want to disable it.
To do so, manually specifying the pipeline parameter is required.
Below is an example of a configuration file that disables Edge detection:
# Option 1: Specify which pipelines to run. The absence of edge_detection will disable it.
pipeline:
  - subsampling
  - surface_modeling
  - tie_points
  - formatting

# Option 2: For each pipeline, specify whether to run it or not. Setting edge_detection to false will disable it.
pipeline:
  edge_detection: false
  subsampling: true
  surface_modeling: true
  tie_points: true
  filling: false
  formatting: true
  merging: false

input:
  sensors:
    img1: /path_to_img1
    img2: /path_to_img2

output:
  directory: out_no_edge_detection/
{
    "pipeline": {
        "edge_detection": false,
        "subsampling": true,
        "surface_modeling": true,
        "tie_points": true,
        "filling": false,
        "formatting": true,
        "merging": false
    },
    "input": {
        "sensors": {
            "img1": "/path_to_img1",
            "img2": "/path_to_img2"
        }
    },
    "output": {
        "directory": "out_no_edge_detection/"
    }
}